Watch the video tutorial to learn how to set up a space on Nibol:
Note: After creating your spaces, you can always change their display order by clicking and dragging each of the spaces you want to move.
Assign a desk or parking space
If you want to assign a workstation or parking space to a specific employee or group of employees:
Click on the entity created within the floor plan.
In the “Assigned to” field, enter the name or email of the employee or group. The system will show you a list of users and groups to choose from.
Save to confirm.
Done!
Note: To be able to assign an entity, make sure you have added the employee members to the user list, here’s how.
Do you want to better understand the difference between an exclusive and a non-exclusive assignment? Read the dedicated in-depth article here.
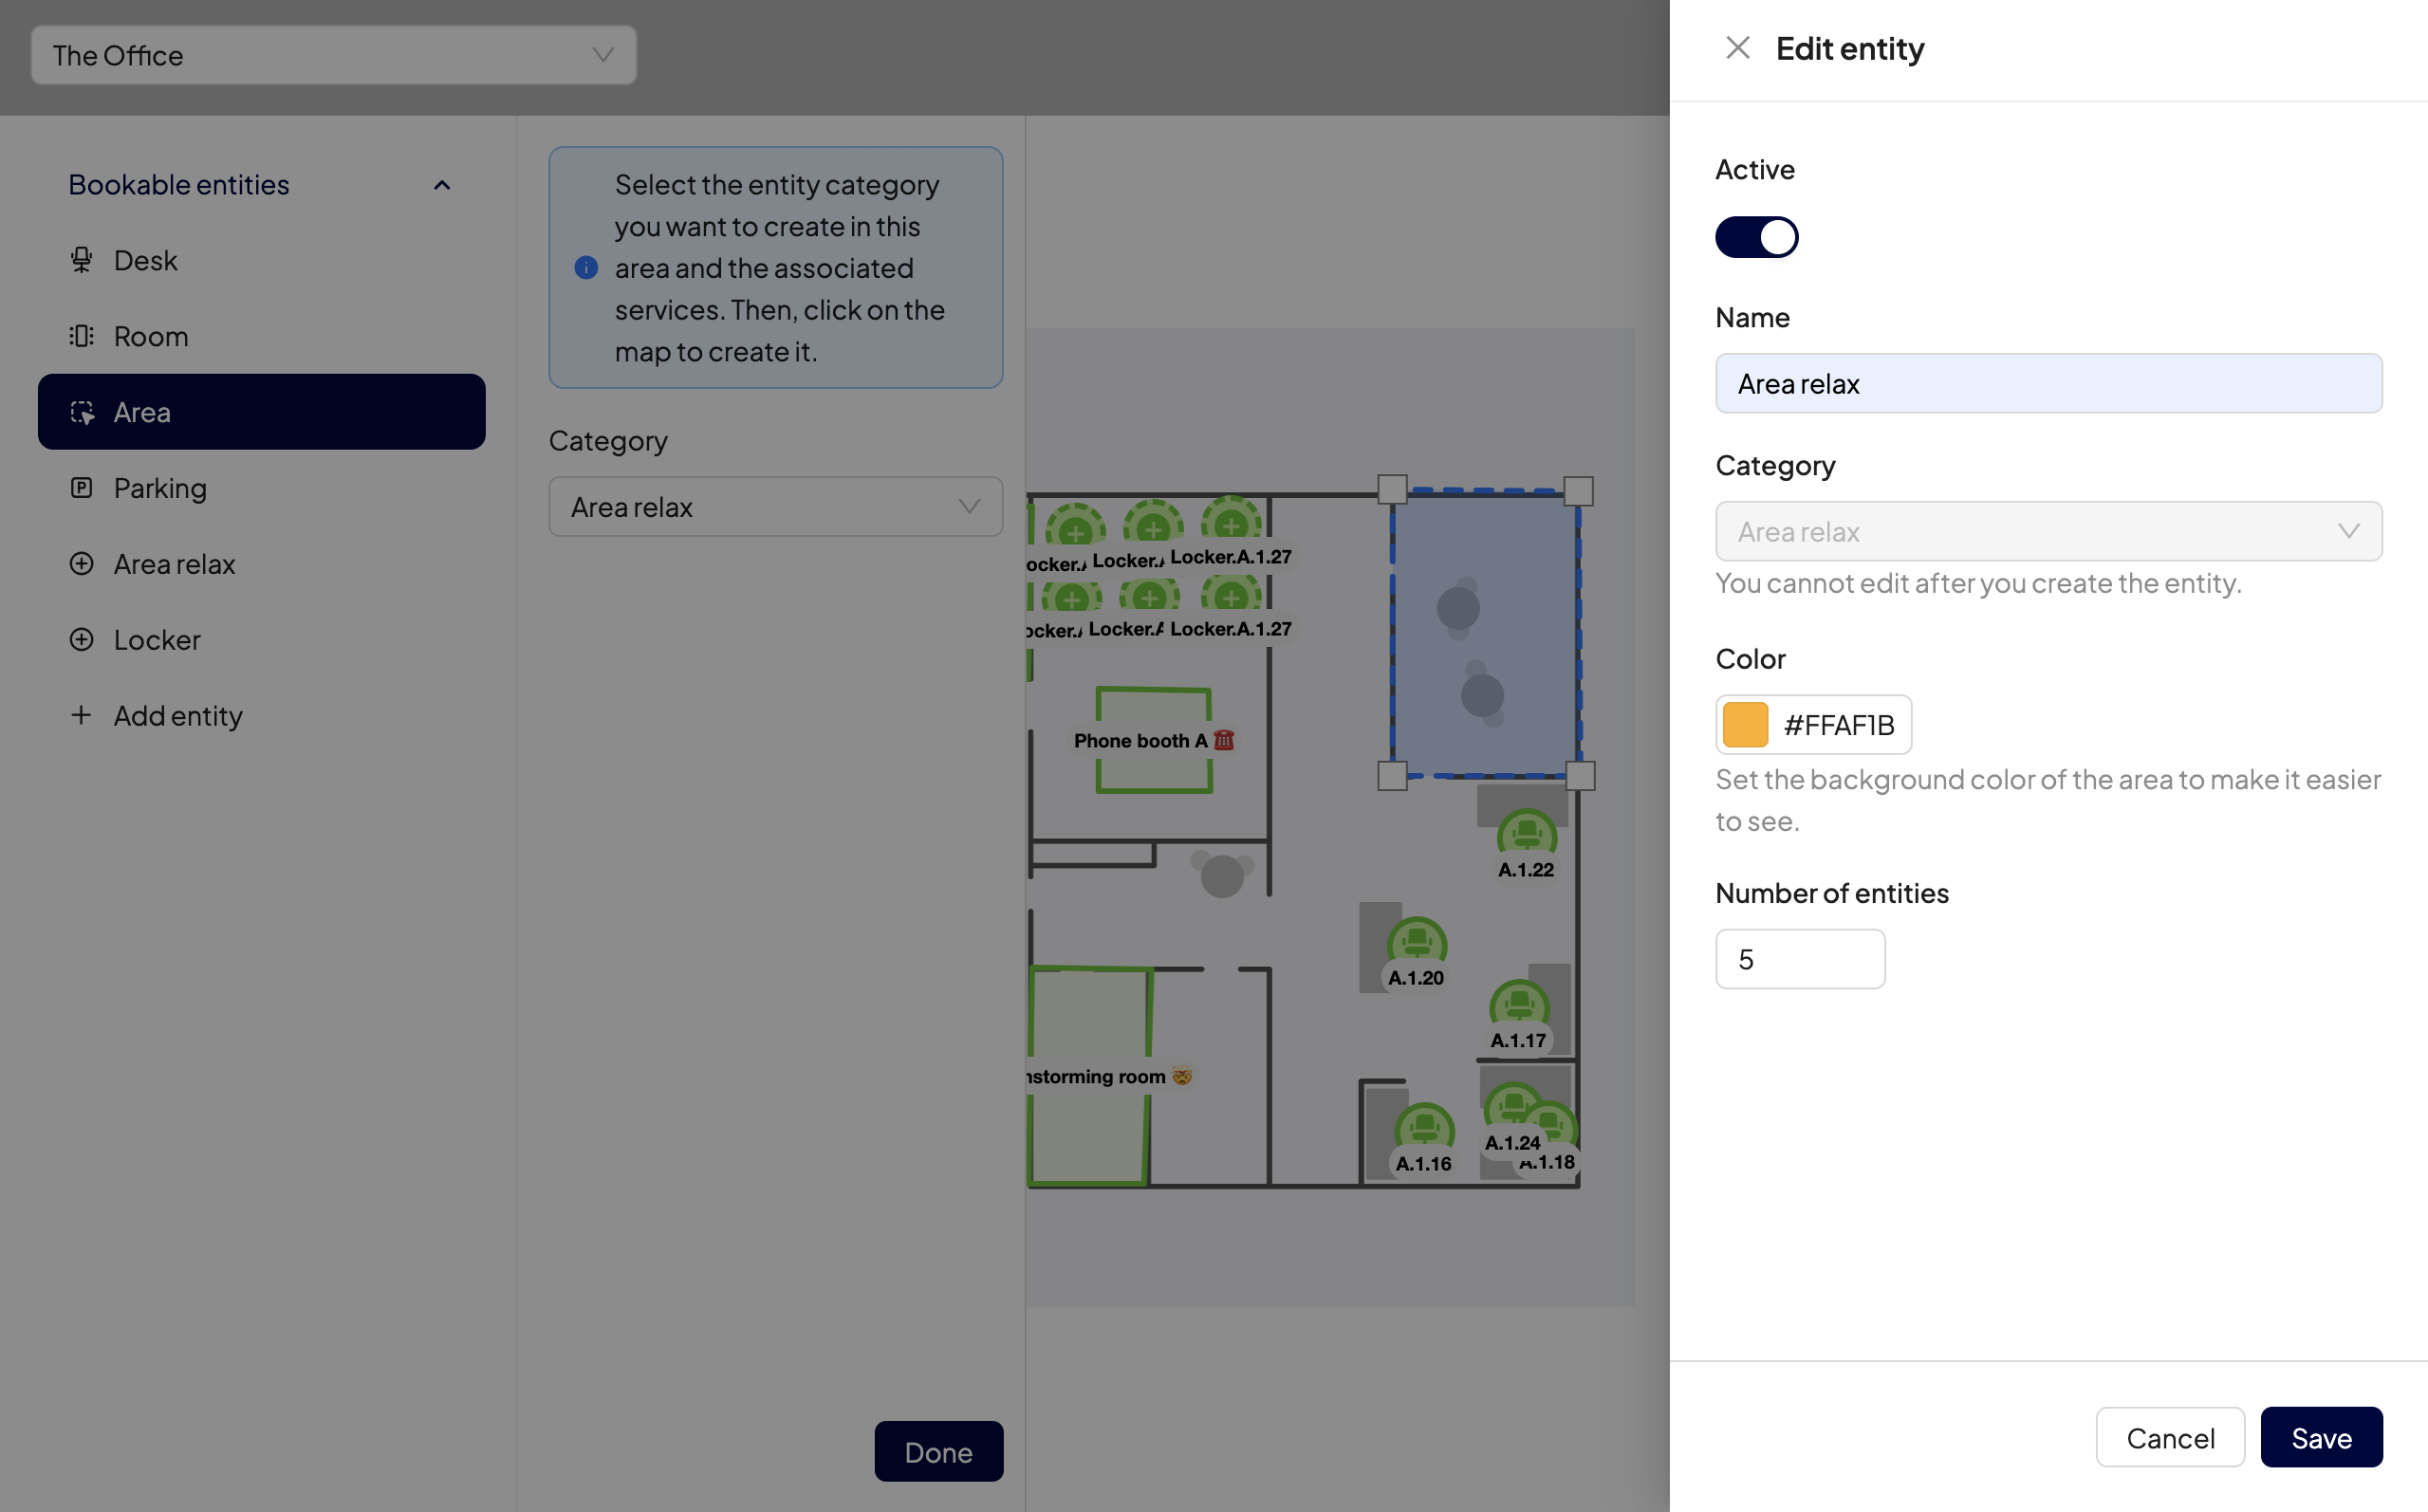
Draw an area inside the floor plan
Within your office floor plan, you can also create bookable Areas, which are zones on the map that contain multiple entities of the same type (e.g. desks, parkings, custom entities). Here’s how to do it:
Select “Area” and choose the category of entity it will contain > if you don’t find the category you need, you can create a new custom one.
Draw the perimeter of the area on the floor plan > click in sequence on all the vertices of the polygon. Finally, click on the starting point to close the area.
Enter the details:
The name of the area (e.g. "Relax Zone" or "Marketing Team Desks").
Choose a color to easily identify it on the map.
Indicate the number of bookable entities within it.
Click Save.
You can also decide that each area on the map should only be visible to certain groups of users. This permission is managed directly from the Group settings. For more details, consult our dedicated guide.
Deactivate a space
If a space is no longer in use (even temporarily), you don’t need to delete it. You can simply deactivate it to hide it from user view.
Find out here how to deactivate a company space.