After downloading the Nibol Welcome app, to connect a new device to the app, just follow these steps:
Go to Nibol > Settings
Open the settings for the building where you want to associate the device > click on Reception
Inside the Nibol Welcome module click on Add device > you will see the name of your device and the pairing code appear, which you will enter directly in the app
Finally, click on Edit to start customising your guest registration form
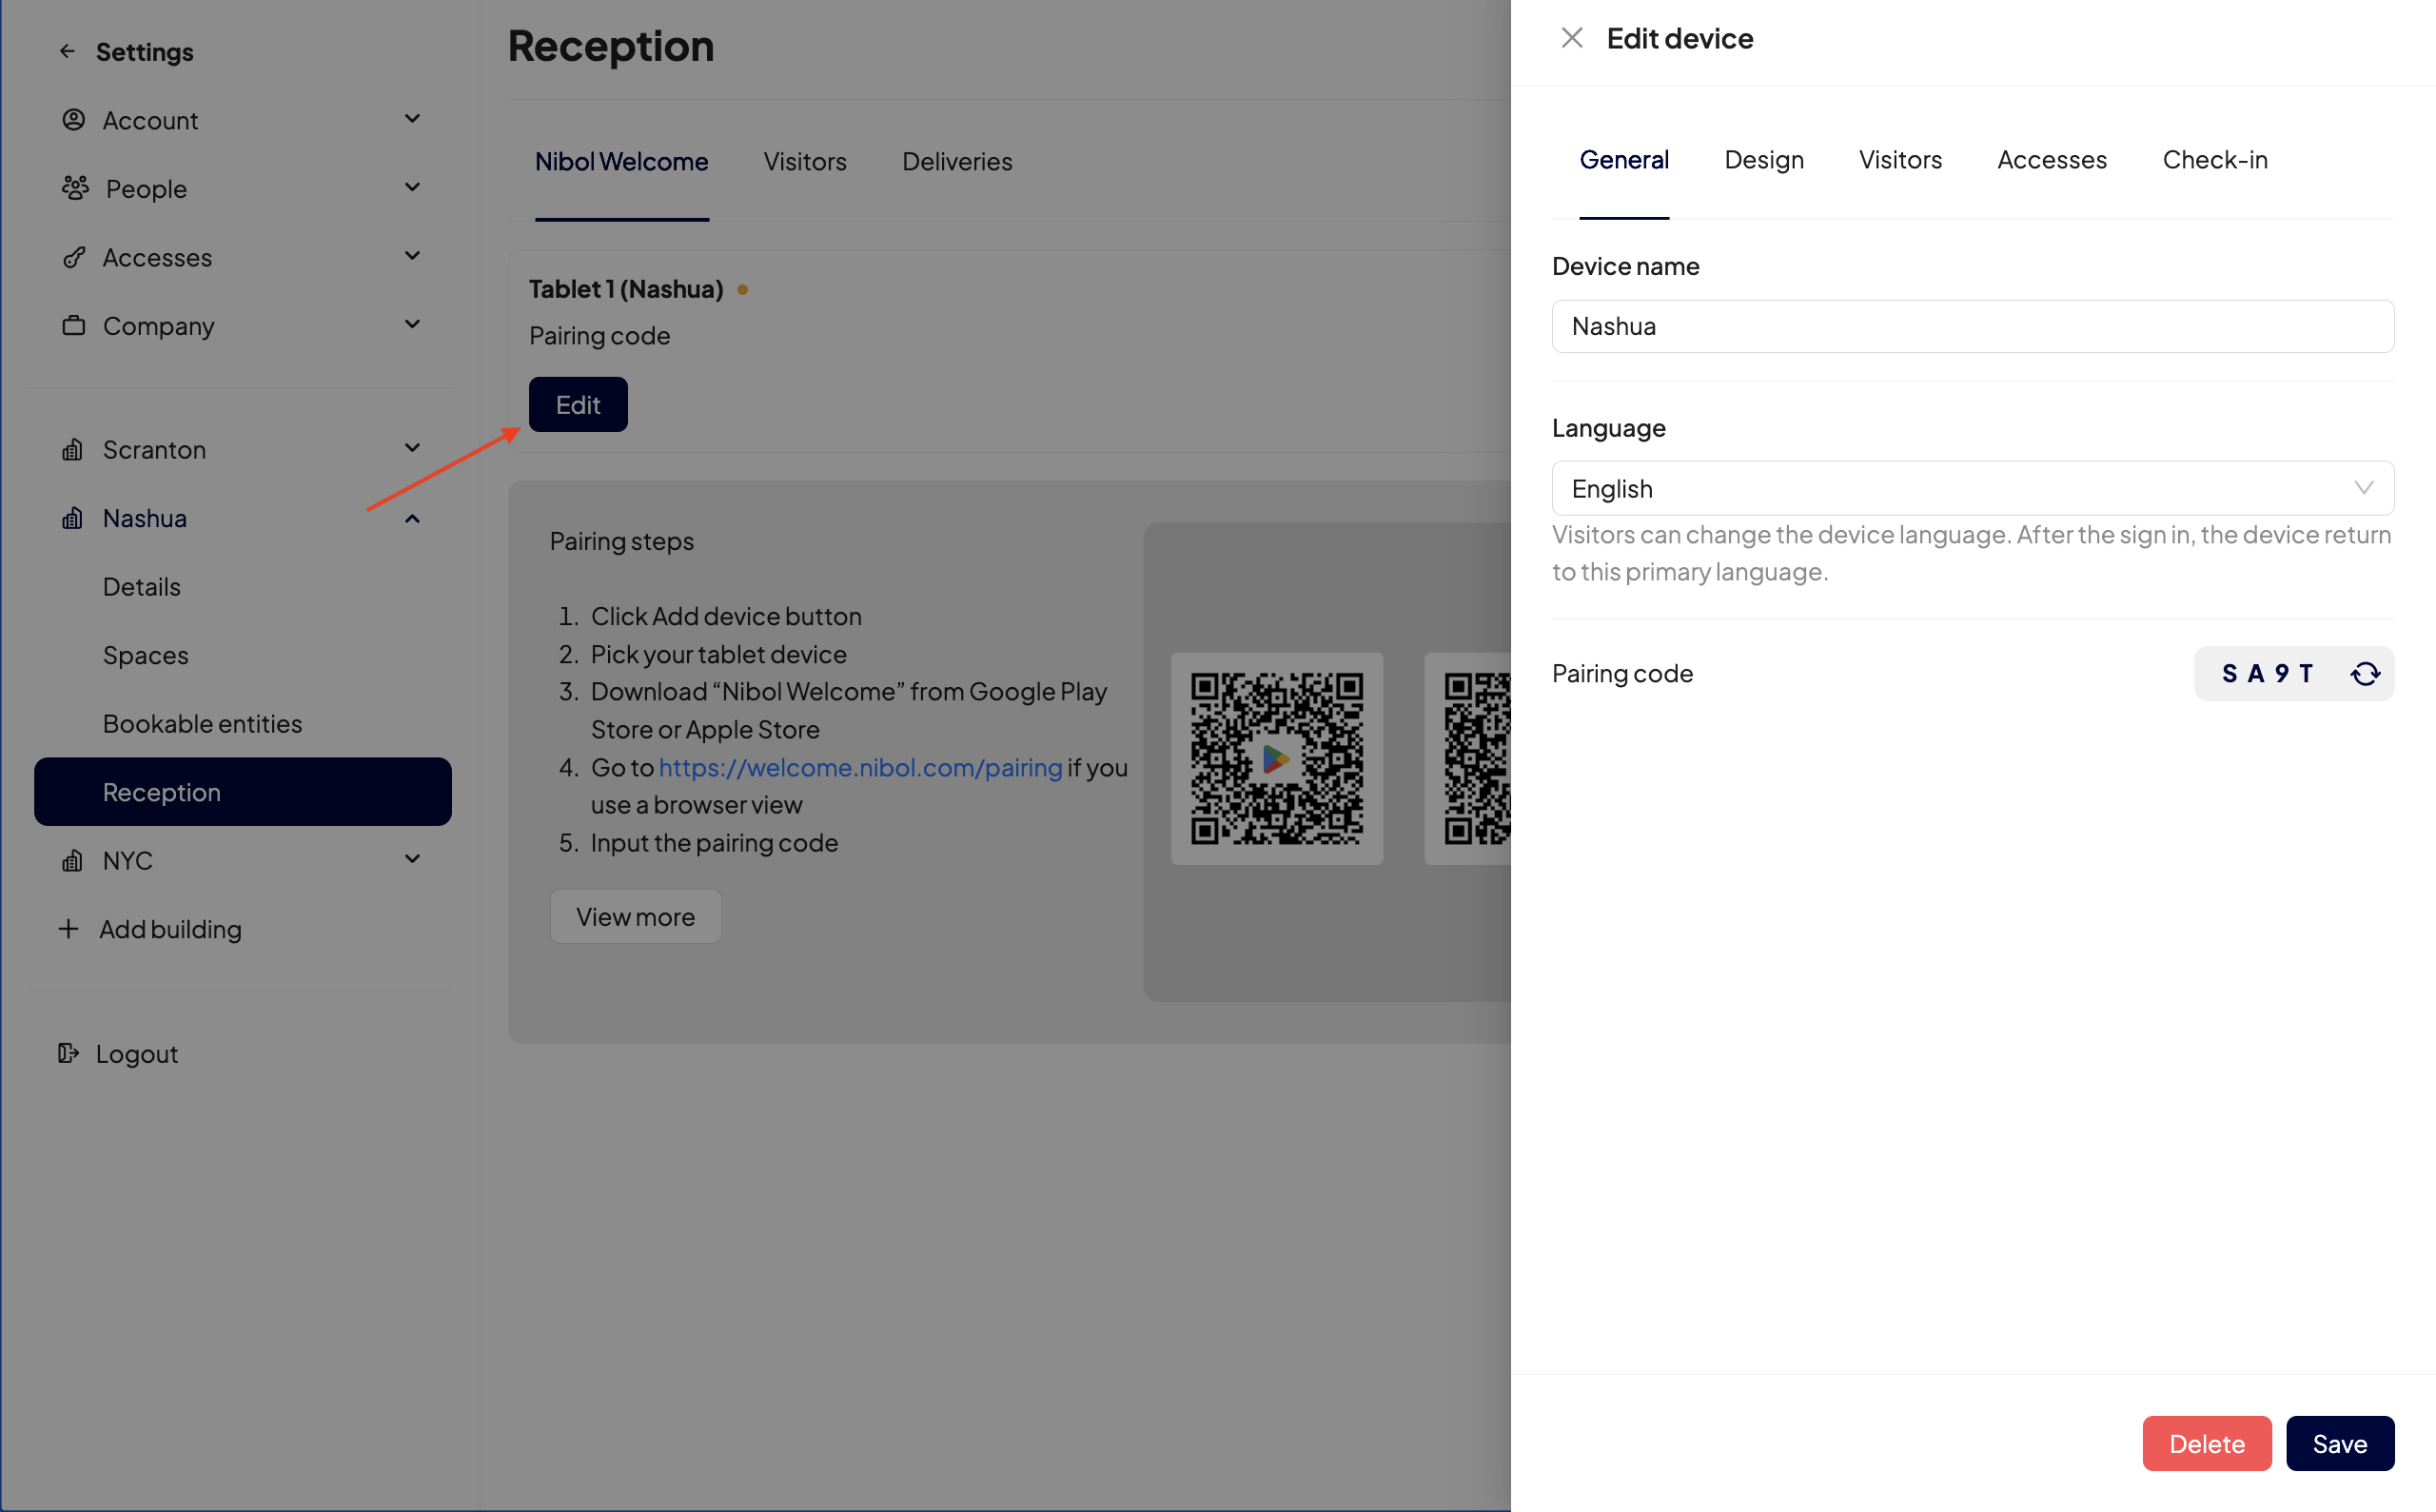
N.B.: Click on the 🔄 icon next to the pairing code if the previous code has already expired (each code generated lasts for 3 minutes).
Within the Edit Device window, you can also:
Change the name of the device.
Set the default language of the Nibol Welcome app (visitors will be able to change the language of the device when confirming check-in).
Customize the graphics by changing the colors of the app's background and text.
Remove the Nibol brand from the screen for an even more professional experience.

Manage visitor settings. To learn more, read this article.
Enable badge association with users. To learn more, read this article.
Enable user reservation check-in by scanning a QR code. To learn more, read this article.
Choose whether or not to require visitors to use the invitation code received by email to check in.
Use the Ⅹ icon next to the Paired Device whenever you want to delete a device or choose to pair another one.