You can use your Android device with Nibol Welcome installed to manage badge assignment for your employees.
This feature allows you to use the integrated NFC reader on your device (Android) to associate a physical badge with a user, without the need for additional hardware.
First, enable the feature:
From the Settings on app.nibol.com, go to the Reception section of your company building dedicated to Nibol Welcome.
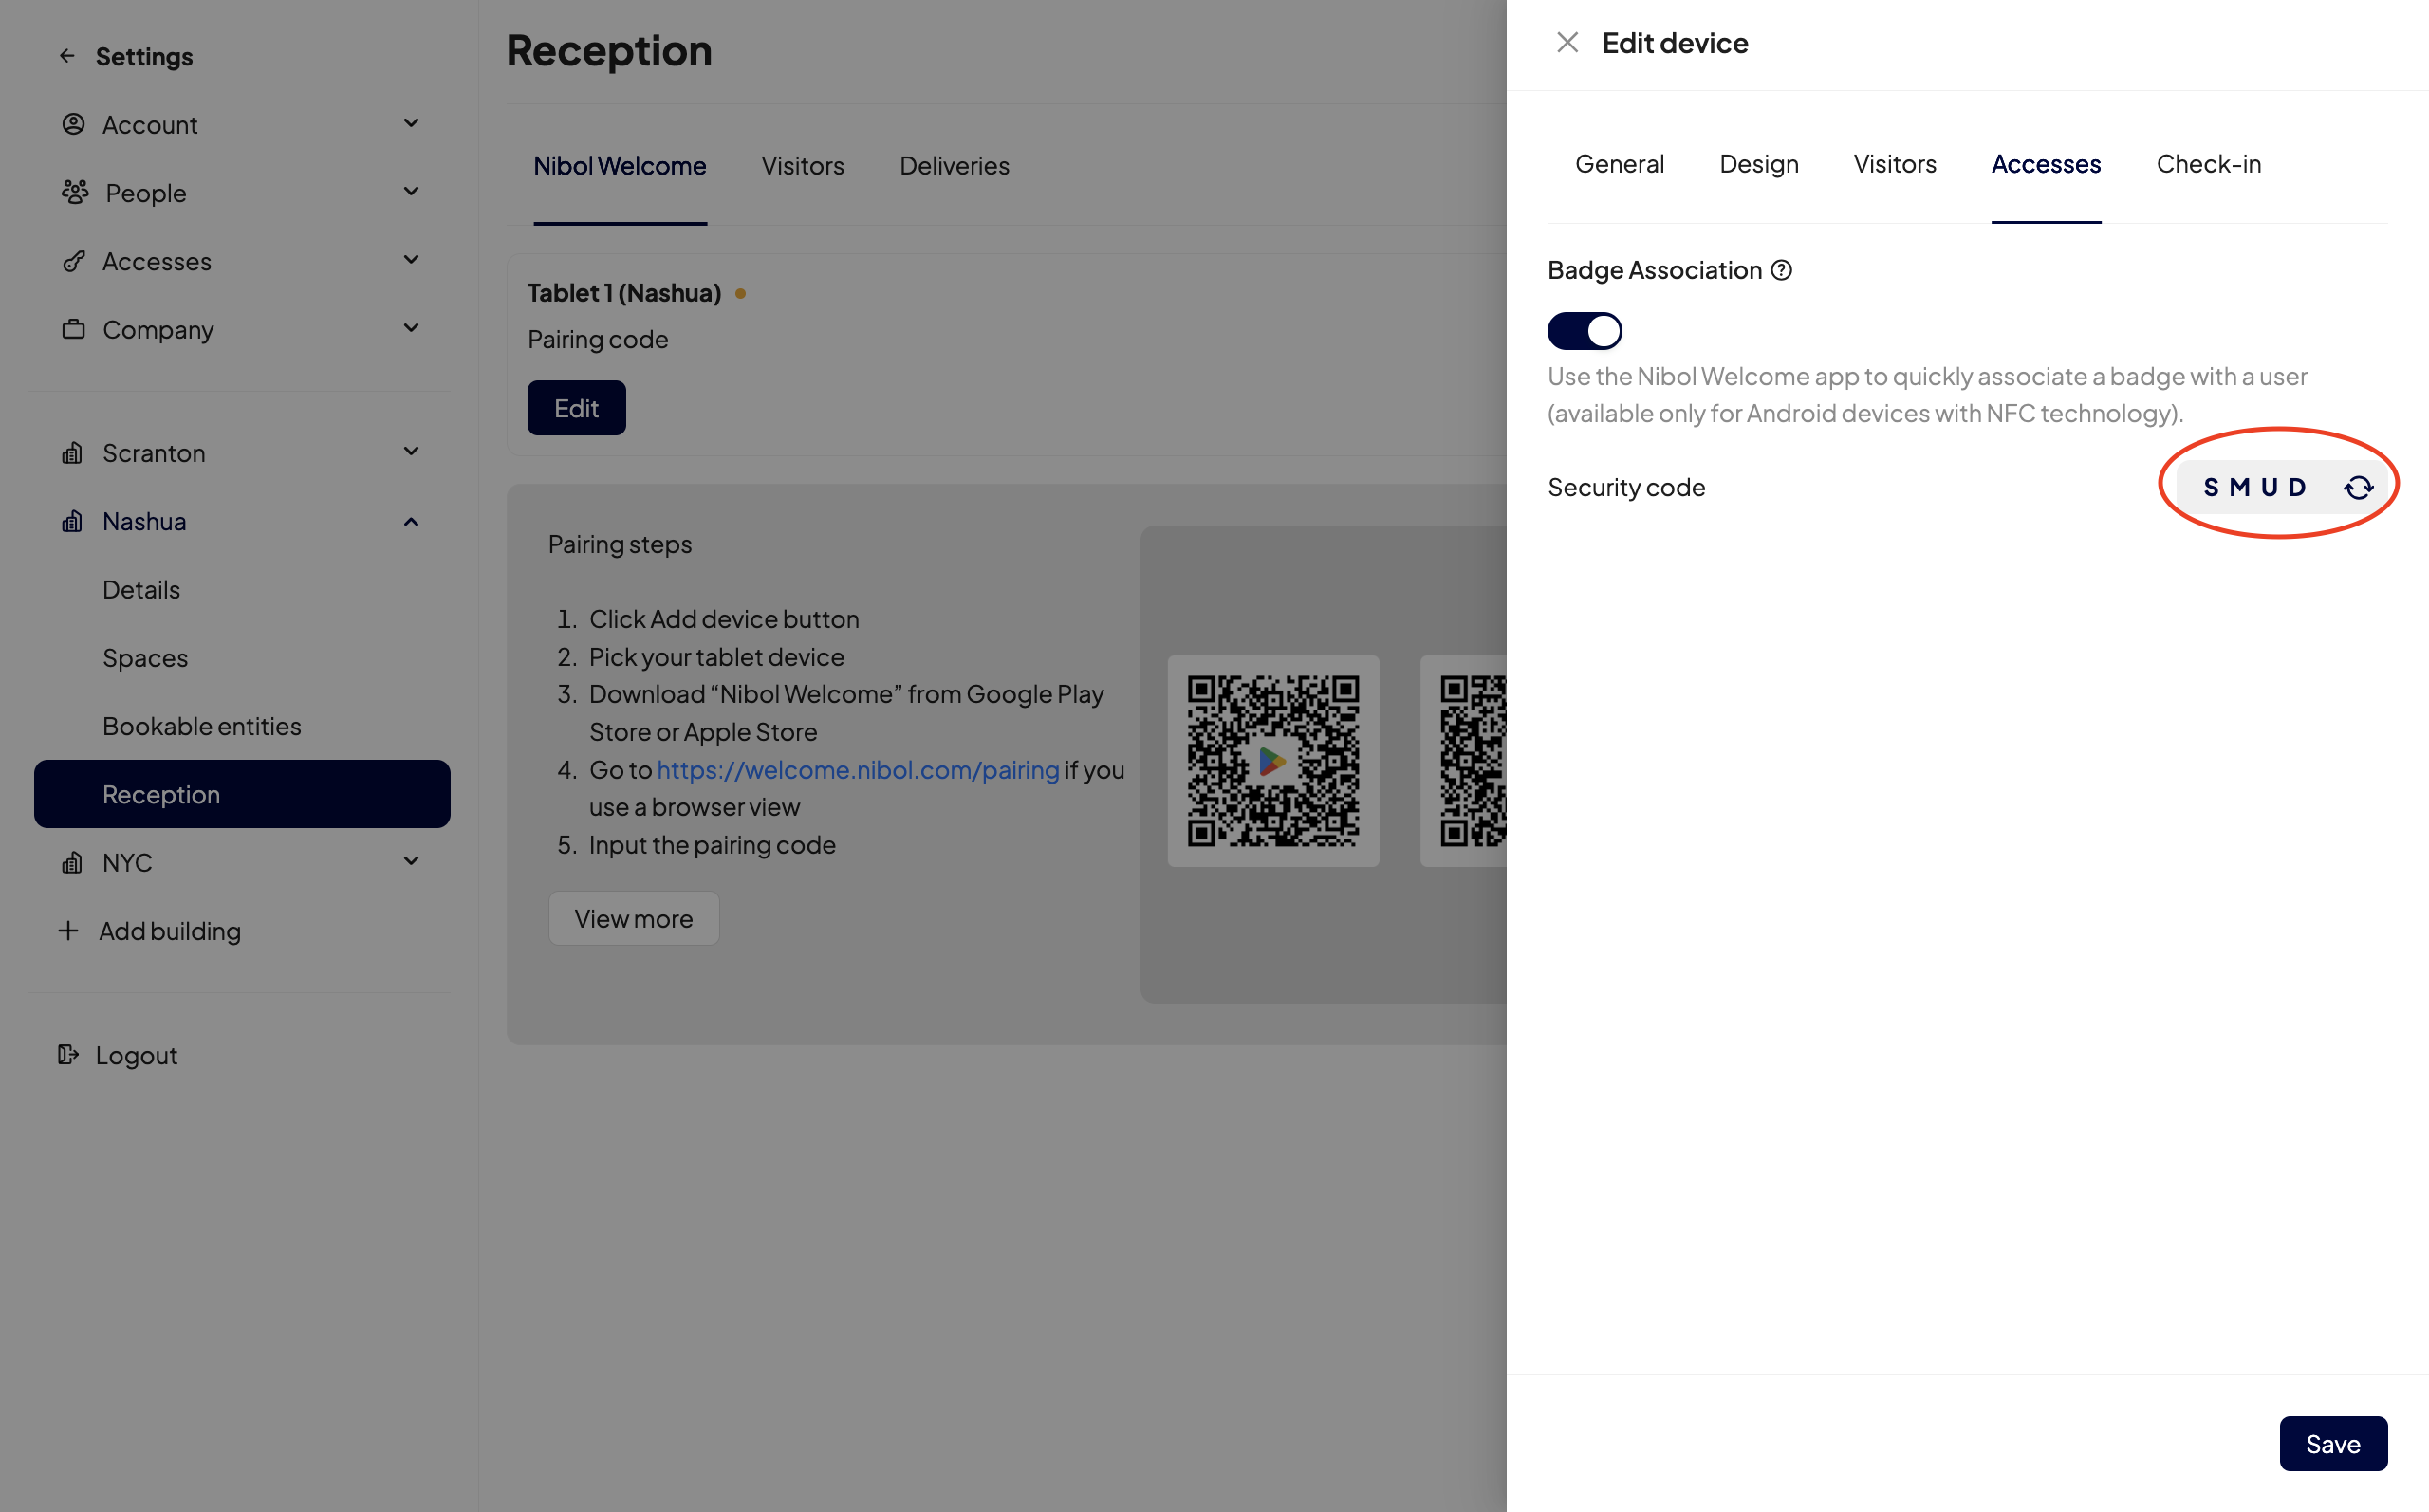
Click the Edit button for the associated device and go to Access.
Here, enable the "Badge Association" option.
Now, switch to the Nibol Welcome app you downloaded on your device (see here how to associate a new device):
Click the Associate Badge button.
Enter the security code you find in the device edit window on app.nibol.com.
Take the NFC badge you want to assign and bring it close to the tablet's NFC sensor (usually located at the top back), then click the arrow at the top right.
Use the search bar to find the employee's name to whom you want to assign the badge. Make sure the user has already been invited and created on the Nibol platform (from the web) and tap the user's name to start the pairing process.
Complete the operation by clicking the arrow at the top right again.
Done! The badge is now uniquely associated with that user, who can immediately use it to check in at desks or access integrated gates.
💡 Important Notes
Device compatibility: Make sure the tablet you are using for Nibol Welcome is equipped with NFC technology and that it is enabled in the tablet's operating system settings.
Overwrite: If the user already had a badge associated, the new association will replace the previous one.